
1. On the top viewport, click shapes and create a 'Rectangle', set its parameters : Length : 35, Width : 18, Corner Radius : 0.
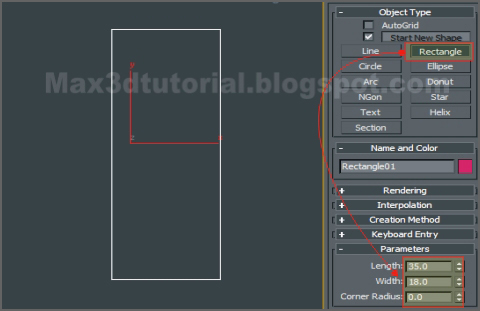
Fig. 01
2. Convert the rectangle to an editable spline by right clicking it and then select “convert to: convert to editable spline”.
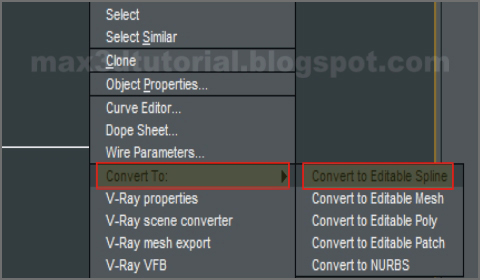
Fig. 02
3. Select the ‘Spline’ and click the ‘Modify’ tab. Choose a ‘Segment’ spline selector and select the top segment.

Fig. 03.
4. Scroll down and ‘Divide’ the top segment become 2 segment. See Fig.04.

Fig. 04.
5. Turn to ‘Vertex’ selector, select the new vertex and pull up. See Fig. 05.
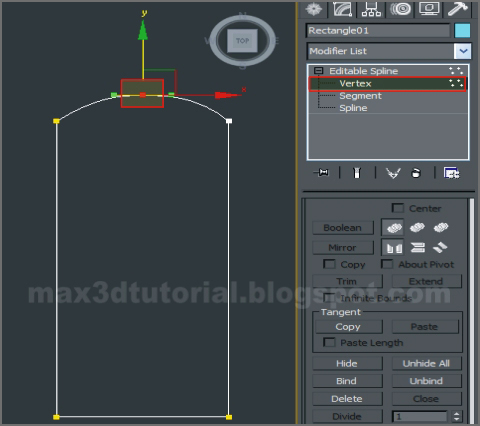
Fig. 05.
6. Select these two vertex, and ‘Chamfer’ it with an amount 1.
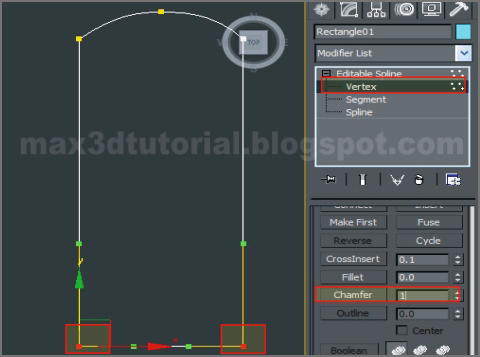
Fig. 06.
7. Go to ‘Perspective’ view, scroll down the ‘Modifier List’, then select ‘Extrude’. Extrude the ‘Spline’ with an Amount : 9 and Segment : 4.
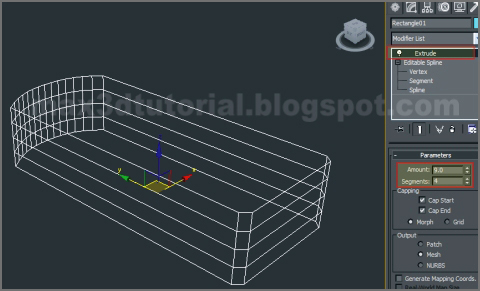
Fig. 07.
8. Still in ‘Perspective’ view, convert the object to an ‘Editable Poly’ by right clicking it and convert to an ‘Editable Poly’.
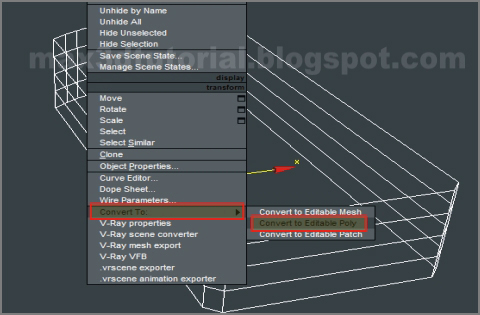
Fig. 08.
9. Select these 4 edges.

Fig.09.
10. ‘Connect’ these 4 edges into a 6 segment.
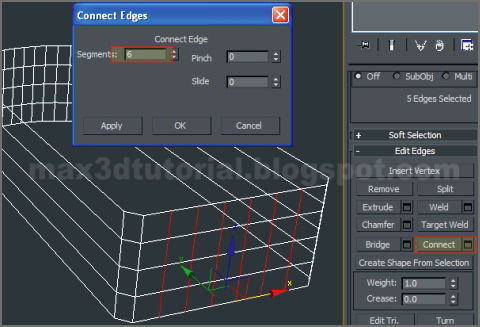
Fig. 10.
11. Select these edges and delete it by pressing ‘Ctrl+Backspace’.

Fig. 11.
12.Change into a ‘Polygon’ selector, select the polygon in the middle, and 'Inset' it with an amount 0.3.
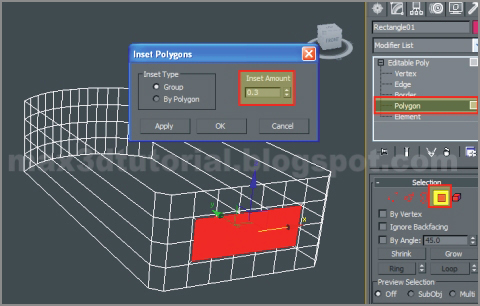
Fig. 12.
13. Select these ‘Polygons’ and ‘Extrude’ with an amount 3, and click an ‘Apply’ button four times.

Fig. 13.
14. Still in ‘Perspective’ view, now we have this shape.

Fig. 14.
15. That’s the end of Part 2. For finishing the detail, I’m gonna make it in Part 3. Se you there!


0 comments